Hi everyone,
So I realised the other day that through my blogging I have gained quite a bit knowledge about photoshop and photography (although my photography is nowhere near as good as I want it...). And actually, a lot of my photography knowledge is based on stuff that's relevant to my particular nails and set-up. But, editing photos is something I am getting fairly good at (I think). Or at least, I have a little routine that I apply to every single photo I edit so I thought I would share my tips with you.
Crop
The first thing I do to any photo is to crop it. No matter how good your photography skills are, your photos will always look better after they have been cropped. Generally, I like to take my photos a little extra further away and then crop them. That way I have more luck in getting every nail in focus.
After cropping, my photo now looks like this:
Levels
My next step is to adjust levels. If you're not sure how to get to the levels adjustments, you go down and click the little black and white circle at the bottom right of the layers panel and select Levels...
Sharpen
I always sharpen my photos when editing because I really think it just crisps up everything. Equally, I always leave it until the last step, before I add my watermark so that I don't overdo it. I think that there are very few things that look worse than an over-sharpened picture. It makes everything look grainy and awful.
I use the Unsharp Mask, which sounds contradictory, but I promise you it does sharpen. If you don't know where to find it, it's under Filter > Sharpen > Unsharp Mask...

So I realised the other day that through my blogging I have gained quite a bit knowledge about photoshop and photography (although my photography is nowhere near as good as I want it...). And actually, a lot of my photography knowledge is based on stuff that's relevant to my particular nails and set-up. But, editing photos is something I am getting fairly good at (I think). Or at least, I have a little routine that I apply to every single photo I edit so I thought I would share my tips with you.
 |
| Before (unedited and nothing) |
The first thing I do to any photo is to crop it. No matter how good your photography skills are, your photos will always look better after they have been cropped. Generally, I like to take my photos a little extra further away and then crop them. That way I have more luck in getting every nail in focus.
After cropping, my photo now looks like this:
Levels
My next step is to adjust levels. If you're not sure how to get to the levels adjustments, you go down and click the little black and white circle at the bottom right of the layers panel and select Levels...
And here's where I do a bit of editing no-no's. When adjusting the levels, I always first click the Auto button (which you're no really meant to do, you're meant to do all the adjusting yourself, but oh well). After I've clicked the Auto button, I either undo that (Crl + Z) and do my own settings if I don't like the Auto settings, or play around with the Auto settings until it's just how I like it.
If you have no clue what I'm talking about with this Levels stuff, that's totally fine, because I made you a little picture explaining what each little arrow does.
For this particular photo, I didn't have to do much in the way of Levels adjustments at all. The lighting was pretty good when I took the photo so all did was darken the dark colours a bit to add contrast and lighten the mid-tones. And so this is what the picture looks like now:
Looking pretty good, right? But I think we can do one better. Which leads me on to my last step...
I always sharpen my photos when editing because I really think it just crisps up everything. Equally, I always leave it until the last step, before I add my watermark so that I don't overdo it. I think that there are very few things that look worse than an over-sharpened picture. It makes everything look grainy and awful.
I use the Unsharp Mask, which sounds contradictory, but I promise you it does sharpen. If you don't know where to find it, it's under Filter > Sharpen > Unsharp Mask...
Again, this photo was actually a pretty good example so I didn't have to sharpen very much at all. So after applying that mask my photo looks like this:
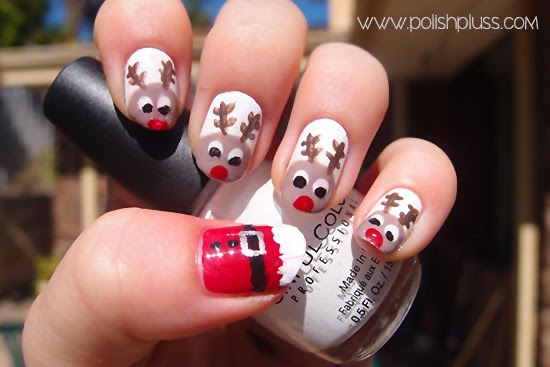
And that's it. They are my 3 steps that I apply to every single one of my photos. Then, after I've made a couple of other adjustments, my finished photo looks like this:
 |
| Finished |
If you are interested in seeing the post that this picture is originally from, it was from my 12 Days of Christmas challenge and the original post is here.


No comments :
Post a Comment
Getting, reading and replying to your comments make my day, so please go and and tell me your thoughts.